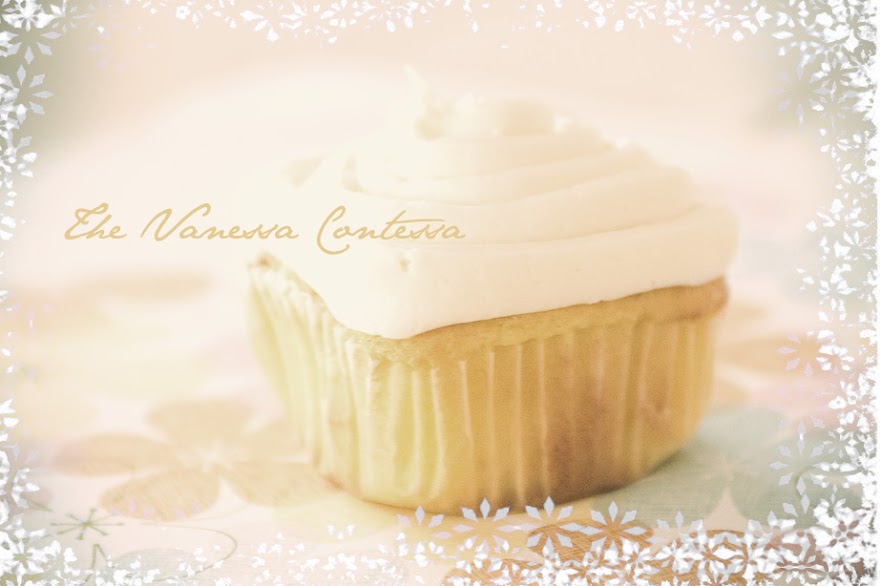


I owed a friend of mine some yummy lemon cupcakes and so I decided to put a little twist on them and make 'em square. I am now completely in love with my square cupcake pan. I think it's technically for muffins and such, but I don't care! Little tiny cakes in square form just warm my heart they are so cute this way, and dare I say it, look even more delicious.
This was a lemon buttermilk cupcake with tangy lemon buttercream icing. It's probably one of my favorite little cakes ever because it's tangy and sweet at the same time and doesn't leave you feeling like you just ate the brooklyn bridge. Of course, that can also be a bad thing, because these little babies are so tangy and refreshing you find yourself always reaching for another! The best part of all is that it starts with a cake mix. I know I know, there are many of you out there who have already turned your nose up, but this is one of the few cake mix concoctions that I highly recommend--it's FANTASTIC. I, however, NEVER recommend prepackaged frosting... If you don't believe me, try it. You'll be pleasantly surprised and it's an easy one to fall back on if you need a quick batch of cupcakes. My guess is, though, you'll make in not for convenience, but for it's awesomeness. Here's the recipe.
Cake:
1 box lemon cake mix WITHOUT pudding
3 eggs
1/2 cup softened butter
1 1/4 cup buttermilk
1/2 tsp. baking soda
4 TBS freshly squeezed lemon juice
Combine all ingredients. Mix on low until combined, then mix at medium speed for two minutes until creamy. Fill cupcake liners 2/3 full and bake for 22-24 minutes at 350 degrees.
Frosting:
1 cup butter
2 cups powdered sugar
2 TBS freshly squeezed lemon juice
1 tsp vanilla
milk if needed
Soften butter by whipping. Slowly add powdered sugar alternating with lemon juice. If frosting seems too dry, add milk 1 tsp. at a time until right consistency is reached. Add vanilla and whip frosting for about 3-4 minutes. Pipe or spread onto cooled cupcakes (or graham crackers or sugar cookies or fresh fruit, whatever, just get some of this frosting into your mouth somehow!)
Tuesday, September 30, 2008
It's Hip to be Square (and a bit Tart)
Monday, September 29, 2008
And the Winner is...
Okay, so my first giveaway didn't get as many entries as I had hoped. However, almost all who entered are friends, so I was excited to give it away knowing I'd be giving to someone I probably knew. In any event, the winner is...
Random Integer Generator
Here are your random numbers:
3
Timestamp: 2008-09-29 22:56:57 UTC
So that means, Miss AmyLouWho with your comment number 3, are the winner of the necklace. You are on some serious winning streak, girl! I'll send it out to you this week sometime!
The Land of Princess Sydney
Sydney brought home her very first kindergarten journal on Friday. It was for the month of September. For those of you unfamiliar with the awesomeness of the kindergarten journal, it's exactly what it sounds like. Everyday the kids draw a picture and write in their journal about things they want to talk about. Sydney's consisted of A LOT of princesses and mermaids and ballerinas, but here are my three favorites: Here we have Sydney's choice in dogs. She's desperate for a dog and wants either a Boston Terrier (compliments of daddy's opinion) or a teacup poodle (compliments of the neighbor down the street with brand new puppy the size of my hand.) Notice the hot pink fluffiness of the poodle. I'm sure in her mind, the teacup poodle of her dreams would have naturally hot pink fur.
 What else is there to say? This one just warms my little bookwormed nerdy heart.
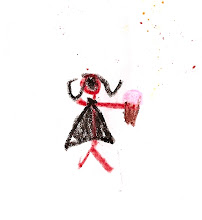
 Finally, if you haven't guessed, this is a family portrait. I'll give you one guess which one Sydney is... I know it's very difficult considering the one on the right is wearing hotpink shoes and a purple princess skirt. Jon's likeness is on the left and side and yes people, that's me in the middle. Now, I'm sure I could psychoanalyze why exactly I look like a combination of Morticia Adams and a Dementor, the guardians of Azkaban prison, but I'd rather just revel in how skinny Sydney drew me. I have definitely conceded, however, that maybe I do wear too much black. (Oh yes, and for those of you wondering where the heck Vivie is, Sydney told me that this is when Vivie was a "baby" baby and she is holding her in her arms in a green blanket. )
I can't wait for October's journal.
Sunday, September 28, 2008
Voting is OPEN!!
Hey Everyone!
Here's a little reminder to go vote for my cupcake in the Iron Cupcake Competition! It's easy, click on the iron cupcake link to the right and find "Vanessa Contessa" on the voting poll on the right of the blog. Pick me and hit vote. Easy squeezy!
Thanks!!
Tuesday, September 23, 2008
Handprints
Seriously. Nowhere is safe from the Evil Genius. Today she climbed up on the kitchen counter, behind the sink and into the sun window in order to leave greasy little hand prints on my kitchen window. She then just climbed down and went on her merry way... What is that?
Monday, September 22, 2008
Iron Cupcake: BASIL
![]()
Yes, that's right. Basil. "What" you say? "Basil in a cupcake?!" Yes my friends, it's true and without further ado, here is my cupcake submission for this month's Iron Cupcake competition:
I have to admit, I was a bit stumped when I first heard basil. It's not that I didn't think you could successfully put basil in a cupcake, it's more that I could only think of three possible basil/sweet combinations:
2. Anything with berries
3. Chocolate
KEY LIME BASIL CUPCAKE WITH WHITE CHOCOLATE BASIL BUTTERCREAM

Cake
2 1/4 C. flour
1 1/2 C. sugar
3/4 C. butter
1/2 tsp. baking powder
1/2 tsp baking soda
3 eggs
1/2 C. fresh squeezed key lime juice
1 TBS zest
3/4 C. buttermilk
Crust
1/2 cup butter
1/4 cup basil leaves
1/3 cup sugar
1/2 cups graham cracker crumbs
Filling
1/2 cup sugar
2 TBS cornstarch
1/2 cup water
1 TBS zest
1/4 cup fresh key lime juice
1/4 cup fresh basil leaves
1 TBS butter
pinch salt
White Chocolate Basil Buttercream
1 cup butter
2 cups powdered sugar
6 oz melted white chocolate
1 TBS minced basil
3 TBS milk or cream

I knew I wanted to to have a bit of a nod to a key lime pie, and for that I needed a graham cracker bottom and tart pucker filling. I got to work on those first. I knew they needed to have the basil taste in them, but I didn't want anyone to be overwhelmed by the basil at all. So I came up with infusing basil in both of these by way of heating it up with the ingredients and then straining out the basil leaves before incorporating into the cupcake.
For the crust, melt the butter slowly on the stovetop with the basil and then strain out before you add to the graham cracker and sugar. Mix all together and spoon a small amount into each cupcake liner.
 Take a small cup and press down
the crumb mixture down into the bottom so it's firmly packed down.
Next, I made the filling. In a small saucepan, combine all ingredients on the filling list and slowly bring to a boil stirring constantly. Let boil for one minute and remove from heat. While it is still hot and liquidy, strain into a small bowl in order to remove basil leave and large zest pieces.
It will be a translucent color and almost seem like half set jello. Place in fridge to chill, it will become a nice creamy consistency, but will retain it's translucence.
Now it was on to the actual cake. I didn't want basil in the cake proper, I thought it would be too much. I did, however want a really good and distinct lime flavor and pucker. For this, I dug out an old standby lemon cake recipe and modified it a bit for my needs this time. First I changed the lemon to lime and then I decided I wanted buttermilk instead of regular milk for that extra richness and tang. Because of this, I needed to modify the baking powder and soda ratios.

For the cake, mix all the dry ingredients together, then add all the wet and mix for about 2 minutes until creamy. Place about an 1/8 of a cup into the cupcake liners on top of the pressed graham mixture and bake in a 350 degree oven for approximately 20-24 minutes. The tops should be just barely risen and spring back to the touch. Don't expect a rising explosion, these are a very dense cupcake.
My trusty kitchen helper seemed to have a blast with this one. From helping stir the batter to squeezing the limes for me. (Okay-- at this point I have a confession-- these aren't key limes I'm using. Some of you probably figured it out by now. This recipe is made for key limes, but if you can't get them where you are or, like me, missed the last crop at the market by two weeks, you can use a Persian lime. It still turned out FABULOUS, but keep in mind, what I really wanted was that true key lime pucker.) And yes, once again I am exploiting the cuteness of my kitchen helper to win your votes... She really wants mommy to win...


Finally on to the finishing touches. When the cupcakes are cool. Fill each one with about a
 tablespoon of filling using a filling piping tip and a pastry bag. The cupcake is pretty dense, so you'll need to use the tip to make room for the filling by inserting it and pushing the cake around a little. When filled, they should look like this. Making the buttercream is simple. It's your standard white chocolate, but with added basil for some extra interest. I melted the chocolate and then pulsed the basil in a food processor until I got the finest mince I could. Next just incorporate the butter and white chocolate together and then start adding the powdered
  sugar one half cup at a time until you get the right consistency. Last, add your minced basil and whip the frosting for about 3 minutes. I always let my white chocolate frosting set for about 10 minutes just to let the white chocolate completely cool before I frost my cupcakes.
I garnished these cupcakes with a small sugared basil piece and a little slice of lime. Even the sugared basil is delicious! Here's an inside look at all the layers.

The cupcakes turned out great. There is a definite basil taste, but it's not overwhelming. It's almost more of an aroma around the cupcakes. They are sweet and rich, but not cloying and taste like a big refreshing bite of summer. I think they would the be perfect ending to a backyard barbeque or summertime crab boil.
Now for the nitty gritty. The voting for this (and all the other) iron cupcake will open on Sunday, September 28th. And I'm begging for your vote. This will go on every month this year, but I want it BAD this month. For one, I think this cupcake is a real contender and for second, look what I can win!
 On top of the prize package that will stay the same month to month, this month's awesome extra prize is this phenomenal cupcake ring by the artist Metal Sugar.
Here's a list of all the other great prizes up for grabs each month:
* A super cute Jessica Steele Apron
* Taste of Home Cookbook
* The Bestselling book Hello Cupcake
* A Cupcake Courier cupcake caddy
* Fiesta Products awesome line of silicone utensils
I'll post a reminder on the blog to make sure you all go and vote (and tell all your friends to go vote, too!) Lastly, any ladies from recipe club out there, I hope you come hungry tomorrow, because I bringing these bad boys with me. You can't expect me to eat 2 dozen basil cupcakes by myself do you?

Friday, September 12, 2008
Microscope Necklace Mania (oh yeah--and a GIVEAWAY!)
Things have been a tad crazy here. Syd started school and choir again (so now I'm back to being regulated by my 5 year old's schedule) and I have been working like crazy to try to get my photography website up and running so I can be officially "re-open" for business after the whole Genevieve saga.
In the meantime I've been entertaining my busy little hands with variations of a basil cupcake for the iron cupcake competition (which I'll post next week) and making my newest favorite jewelry, the microscope slide necklace. Most of you probably remember the one I made for the Breaking Dawn release, if not, check it out here. Since then, the floodgates have opened. I have made three more pendants in the last few weeks. Now, these are not made with one of those kits or premade metal frames. My own two little hands printed the images, cut the glass, wrapped them in copper and soldered them... okay I didn't solder them myself, my super husband did because he loves me and wants me to keep my fingers... but still they are one of a kind, and they are awesome. Of these three, one is for me, one is for my mother in law, and one of them is for YOU!
Here they all are in their soldered glory. The first one I made is for me. I made a square pendant set on an angle so it hangs down like a diamond. The image inside is a picture of an old vintage camera and on the back is my favorite quote from Ansel Adams, "When words become unclear I shall focus with photographs. When images become inadequate, I shall be content with silence."
The second one is for my sweet mother in law, it is a picture of the LDS Salt Lake Temple and on the back there is a scriptural passage. I hope she'll love it since it's for her birthday (and she should receive it before I post, so no spoiler...)
The third might just be my favorite and I made it for someone out there in blogland. I have this idea floating in my head for a while. I took a photograph of some gorgeous gerber daisies I picked up at the farmers market a while ago and I have never found the right purpose for it. Finally when tossing and turning the other night I thought of an idea...

On the front of this necklace is a the picture of the yellow daisies and on the back just one simple word; SIMPLIFY.
I thought it would be a perfect giveaway piece. Sometimes it seems like all us mommy bloggers are trying to do everything all at once and it never seems to work out. I know I repeatedly tell my daughter that I only have two arms and two legs, but sometimes I have to remind myself of that fact as well. So here it is ladies, your own little personal token to wear and remember to keep it simple. In a way it's a bit of thank you to all your great blogs and the entertainment they give me when I'm stressed.
I love it, it's pretty and sunny and unexpected. I hope you like it as much as I do.
Now let's give it away! I've never done one of these before and I'm a little out of my league, but it totally want to sit at the giveaway blogger lunchtable so here we go. To enter follow these two steps:
1.Post a link to me on your blog (or facebook or myspace, whatever your little 'net space is) to let everyone know about the giveaway.
2. Leave a comment here. The comment must contain either the word cupcake or the word awesome (it's my blog so I can do whatever I want.) Get creative people, these are two of my most favorite words ever, so let's see what you can do with them.
3. Only comment once and all anonymous will be deleted.
The entries will be open for two weeks. On September 28th I'll announce the winner. (Oh yeah, and I'm picking the winner by random generator, not by how awesome your cupcake and awesome comments are.) One final note, the pendant come alone-- so you can add whatever chain you like.
Good Luck!
Thursday, September 11, 2008
Empty Posts, Evil Geniuses and Fashion Divas
Sorry for the lack of posting, I'm swamped with other stuff, but I promise something AWESOME this weekend (can you spell giveaway? YES!! My very first attempt at one ever!)
Sydney had a friend over after school today and they wanted to play "fashion model." Basically it consists of me taking out all my camera stuff and them hamming it up. Fine by me since my new camera arrived two days ago and I'm still having fun playing around with it. They had a great time...
Here's the very last picture I snapped....
Tell me this is not the face of an Evil Genius.... I know she's got to be plotting world domination.
Come back on Sunday to see all the goodies I've been working on and see what I'm going to give away!
Monday, September 1, 2008
The Contessa Apple Pear Pie

Growing up, my mom used to make the most amazing pies (and still does.) My favorite of all time had to be her pear pie. I never realized a pear pie was a bit unusual until I got to be an adult and would tell people that it was my favorite. Most of the time their response was something like "I never even thought of putting pears in a pie!" Really, it's not that strange, just think of the best apple pie you've ever had -- and times it by 3 and then you have a pear pie. They are GREAT!
So, my brother in law Dave came in town today and I wanted to make something for dessert tonight, but nothing sounded fun. Then, at the store I noticed pears were 3 pounds for a buck. Whoohoo!! Pear pie it was. I loaded up the pears, but when I got home I felt a bit guilty when I unloaded the groceries and realized I had a half a drawer of apples in my fridge. Most of them were past the Princess Sydney approved crispiness, so I figured they needed to be put into the pie, too. So here you go, my recipe for Apple-Pear Pie. This isn't some earth shattering recipe and you won't find any super huge secrets. Just a good recipe the way I like to make it:
The Vanessa Contessa Apple Pear Pie
3 good baking apples
5 bartlett pears
1/4 cup flour
1/4 cup brown sugar
1/2 cup granulated sugar
1 TBS cinnamon
1/4 tsp freshly ground nutmeg
1/4 tsp salt
1 tsp vanilla
1 TBS lemon juice
3 TBS butter
pie crust
1 egg for egg wash
sugar for crust
Preheat oven to 425 degrees.
Peel and slice apples and pears however you so desire. In a large bowl, combine apples, pears, lemon juice, salt and vanilla. Mix well until all the apples are coated. Next add the sugars, flour, cinnamon and nutmeg and mix well again until everything is evenly coated.
Next, your going to want to spread out your pie crust into a pie pan. Now, for this (and for most of my pies) I use store bought pie crust. I know, I hear the shrieks of anger now. Yes, I am well aware that homemade pie crust is WAY better, but frankly I just don't have the patience--and I have very HOT hands, so I can't ever work with it for very long. (Plus, it's sad, but very often I can get a ready made pie crust on sale at $2 but the butter is up to 4 freakin' bucks a box!!) Phew... I'm done.
Pour the apple/pear mixture into the pie crust and then cube up 3 TBS of butter and strategically place them throughout in order to achieve maximum butter goodness.
Next, place the second pie crust on top and then crimp sides. You can make sure to crimp them super nice and neat, or if your like me, you can just crimp them however which way they'll go 'cuz this point you'll just want to get the dang thing in the oven already. Make a few slices on top of the pie to let out steam.
Finally, you'll want to make a wash for the crust. I use and egg wash. I egg beaten up with a bit of water and then brush it onto the top. Very last, I always sprinkle some sugar on top of the just brushed crust. Now, here's my super secret. For the last two years, my mom has picked up some fancy shmancy Maui gold sugar in the raw for me on her Hawaiian vacation. I LOVE the stuff. I ration it out for as long as possible and only use it for very special purposes. One of those purposes is to sprinkle on my apple pie. It's awesome. It gives is a very nice flavor and a nice crunch on the crust. I love it. You can use regular sugar or you can also substitute sugar in the raw.
I usually bake it for about 45 minutes. The other trick I do is to put on little foil tents on the edge of the crust BEFORE it goes in the oven and then I take them off exactly half way through the baking time. This has always yielded a perfectly browned crust.
Let it cool for and hour!! This is uber-important. I think it probably has to do with the fact that the juices of the fruit and the flour need time to thicken, but if I ever cut into it too soon, I always end up with a watery mess.
Serve it with whipped cream or, for the extra adventurous, a thin slice of cheddar cheese melted on top (trust me--it's awesome.)
Enjoy!!!